Quickstart
In about ten minutes you'll create a project, create a component from a platform-provided template, deploy it, reach its running endpoint on the public internet, and read its logs — all on the live Fedshi instance. No Kubernetes knowledge required.
DevsPortal is built on the Control Plane Operator engine. The occ CLI and
openchoreo.dev/v1alpha1 resources you'll see here are unchanged engine internals.
Before you start
You need:
- Access to the Fedshi console (https://console.idp.fedshi.com) and,
for the CLI steps, a working
occinstall pointed at the control plane. If you don't have these yet, do Getting access first — it takes five minutes. - A role that lets you create projects and components in a namespace. The examples use the
fedshinamespace; substitute your own if your team uses a different one.
We'll deploy a small prebuilt sample service so you don't need any source code of your own. You can swap it for your own image later.
Every step below leads with the portal UI — the recommended path, and the fastest way
to learn the platform. The equivalent occ CLI commands follow each step for when you
want to script or automate. Do whichever you prefer; they drive the same API.
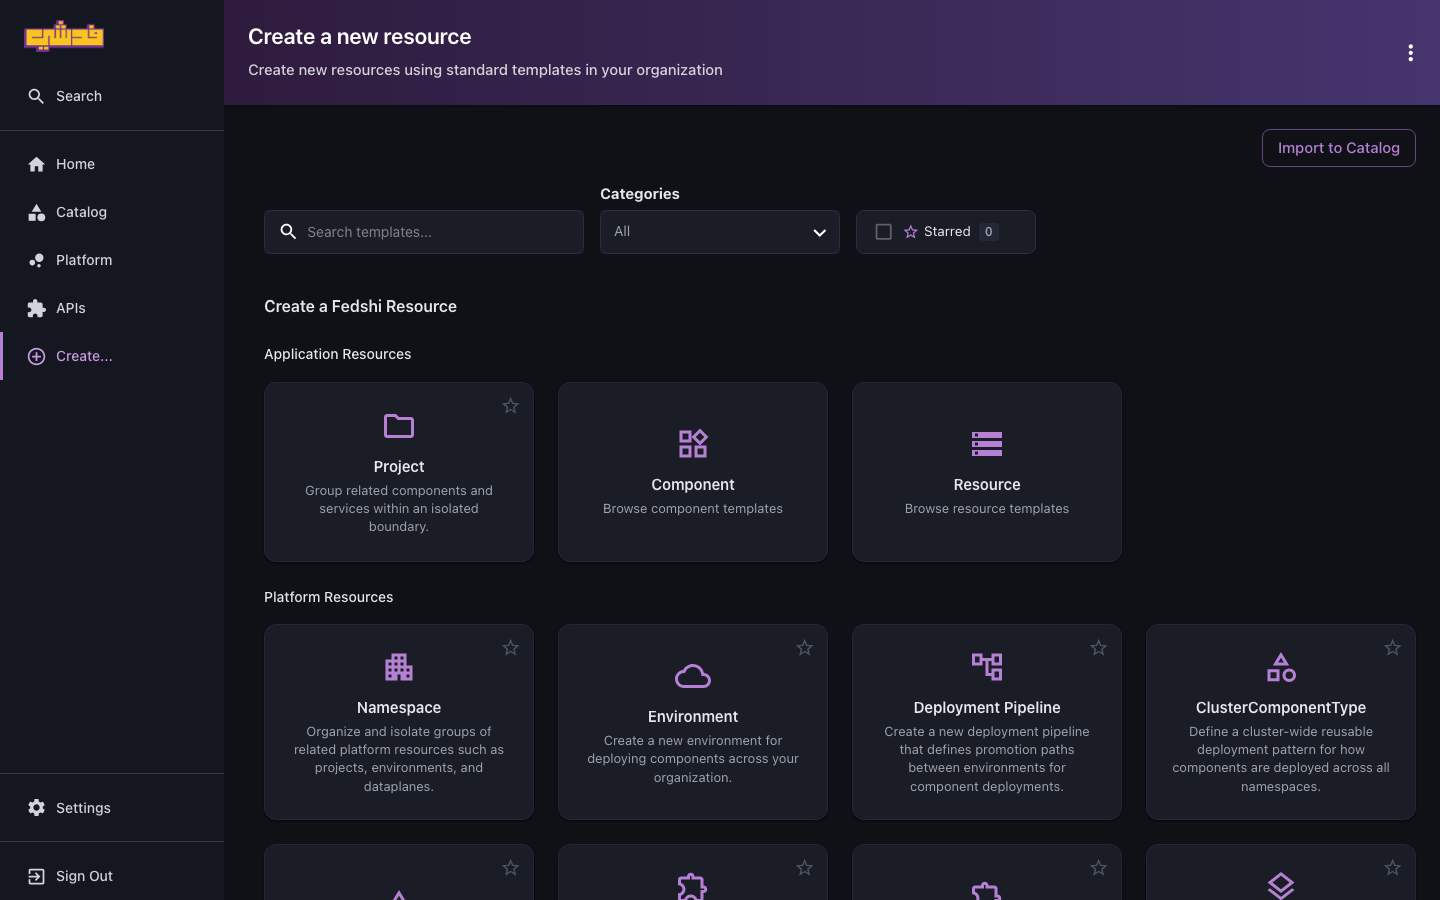
Everything starts from Create… in the sidebar, which opens the self-service catalog of templates your platform engineers maintain — Projects, Components, and Resources for you, plus platform building blocks:
Step 1 — Create a project
A Project groups related components and gives them an isolated runtime cell. Create one
called quickstart.
In the portal: open https://console.idp.fedshi.com, click Create
Project, set the name to quickstart, leave the deployment pipeline as default, and
click Create. It appears in the catalog immediately.
Or with the occ CLI:
occ project list -n fedshi # see what already exists
Then create quickstart by applying a manifest:
# project.yaml
apiVersion: openchoreo.dev/v1alpha1
kind: Project
metadata:
  name: quickstart
  namespace: fedshi
  annotations:
    openchoreo.dev/display-name: "Quickstart"
    openchoreo.dev/description: "My first DevsPortal project"
spec:
  deploymentPipelineRef:
    kind: DeploymentPipeline
    name: default
occ apply -f project.yaml
occ project get quickstart -n fedshi
Step 2 — Pick a ComponentType
A ComponentType is a template your platform engineers maintain — it decides what Kubernetes shape your component takes (a Deployment, a CronJob, and so on) and what parameters you can set. List what's available:
occ clustercomponenttype list
You'll see the built-in types. For an HTTP service, use deployment/service. (Other
common ones: deployment/web-application for frontends, deployment/worker for
background workers with no endpoint, cronjob/scheduled-task for periodic jobs.)
Step 3 — Create a component from a prebuilt image
A Component is your deployable unit. We'll create one called greeter from a public
sample image, expose an HTTP endpoint, and turn on auto-deploy so it ships to the first
environment automatically.
In the portal: in your quickstart project, click Create Component, then in the
3-step wizard:
- Metadata — name it
greeter. - Build & Deploy — choose Container Image and enter
ghcr.io/openchoreo/samples/greeter-service:latest. Turn Auto Deploy on. - Service Details — add an endpoint of type HTTP on port
9090with external visibility. Click Create.
Or with the occ CLI: apply the Component and its Workload together:
# greeter.yaml
apiVersion: openchoreo.dev/v1alpha1
kind: Component
metadata:
  name: greeter
  namespace: fedshi
spec:
  owner:
    projectName: quickstart
  componentType:
    kind: ClusterComponentType
    name: deployment/service
  autoDeploy: true
---
apiVersion: openchoreo.dev/v1alpha1
kind: Workload
metadata:
  name: greeter
  namespace: fedshi
spec:
  owner:
    projectName: quickstart
    componentName: greeter
  container:
    image: ghcr.io/openchoreo/samples/greeter-service:latest
    args: ["--port", "9090"]
  endpoints:
    http:
      type: HTTP
      port: 9090
      visibility: [external]
occ apply -f greeter.yaml
Because autoDeploy: true is set, DevsPortal snapshots the component into a
ComponentRelease and immediately deploys it to the first environment in the pipeline
(development). You don't have to do anything else for the first stage.
Step 4 — Watch it deploy
In the portal: open the greeter component, go to the Deploy tab. The
development environment card moves from Pending to Ready once the pods are up — it
also shows the image, the release name, and the endpoint URL.
Or with the occ CLI:
occ component get greeter -n fedshi
occ releasebinding list -n fedshi -p quickstart --component greeter
Wait for the development binding to report Ready (usually under a minute).
Step 5 — Reach the running endpoint
Because you declared the endpoint as external, the platform created a public route for
it on the Fedshi apps domain. External endpoints land on {fedshi.apps} — the
exact host follows the pattern {component}-{environment}-{project}.apps.idp.fedshi.com.
For this deployment that's:
curl https://greeter-development-quickstart.apps.idp.fedshi.com/greeter
The simplest way to find the exact URL is to read it off the Deploy tab's environment
card, or from the endpoint shown in occ component get greeter. You should get a friendly
greeting back. Your service is live, on a real hostname, with TLS, with no ticket filed.
Endpoints you mark internal or project are not reachable from your laptop — only
the external ones get a public route. That's deliberate: most backend services should be
private. See Workloads and endpoints.
Step 6 — Read the logs
In the portal: on the greeter component, open the Logs tab. Filter by
environment and time range, and search for keywords.
Or with the occ CLI:
occ component logs greeter -n fedshi -p quickstart --env development
occ component logs greeter --env development -f       # follow live
That's the full loop — create, deploy, reach, observe — on real infrastructure.
Step 7 — Promote to staging (optional)
The same release you tested in development can be promoted up the pipeline unchanged:
occ component deploy greeter -n fedshi -p quickstart --to staging
In the console, click Promote on the development card. The byte-for-byte identical
release now runs in staging too. Full details in
Deploy and promote.
Clean up
When you're done experimenting:
occ component delete greeter -n fedshi
occ project delete quickstart -n fedshi    # also removes any components left inside it
Where to go next
| To learn how to… | Read |
|---|---|
| Organize many components and projects | Projects and components |
| Define richer endpoints and visibility | Workloads and endpoints |
| Build your own image from source on every push | Builds and CI |
| Connect to a database or another service | Dependencies |
| Promote with per-environment config | Deploy and promote |
If you're bringing a whole team onto DevsPortal, hand them this quickstart after their admin completes Onboard a team.